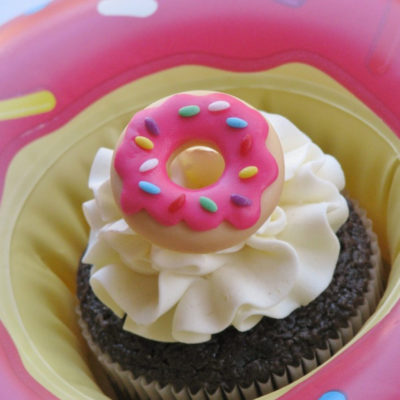
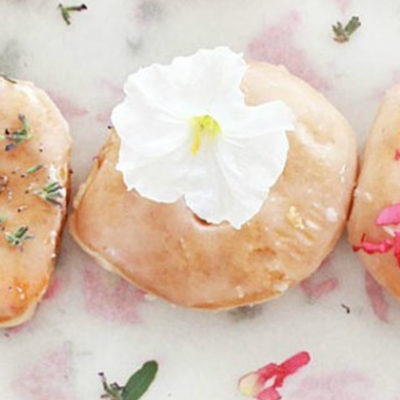
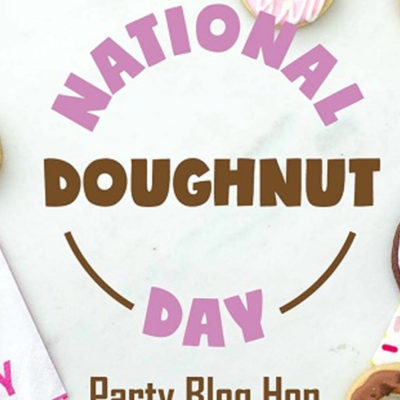
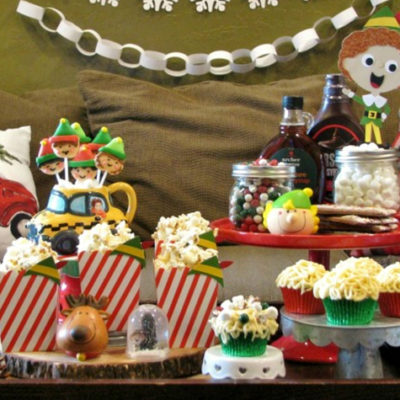
2.13.2012

Baked with Love!

There has been a trend lately of darling baking-themed parties, such as some of my adorable faves by Passion for Parties, She's Kinda Crafty and One Charming Party! My daughter, Anabelle, and I were so inspired to put together a sweet little play date to celebrate Valentine's Day with one of her BFF's, Mikayla! 

For the invitation, I found the cutest "Lil' Baker" clip art from Shelley at SpringHill Graphics (she was even so kind to revise the girls' hair color to that match that of Anabelle and Mikayla!), which was attached to a heart-shaped wooden spoon from the discount bins at Target. I used additional images from this set, along with background patterns so graciously offered for free download by Print Candee, for the rest of the paper goods throughout the decor.
The table was set in the coordinating colors of pinks, white and browns with a burlap tablecloth and felt heart cut-out placemats from Home Goods. I am in love with utilizing these placemats for the bright colors and variety of patterns, for even other, creative uses, such as in my Silly Old Bear party last year where I attached several together to create a backdrop. I utilized beautiful cupcake plates that my sister-in-law had given me a few years back, along with cupcake mugs my mother had bought me (can you tell my friends and family spoil me with cupcake-related gifts?!), which were filled with chocolate milk and whipped cream. The girls were greeted with a set of oven mitts, aprons and chef hats adorned with cupcake liner flowers. I first saw this adorable idea from One Charming Party and followed a tutorial from Urban Comfort to create my own! I added little rubber cupcake pins found at Joann Fabric & Crafts. Little mason jars filled with spatulas (thank to a tip from Sugarbelle's on Facebook!) and rolling pins were at each setting for when it came time to decorate their own cupcakes and cookies. 
My daughter's kitchen set from Pottery Barn Kids was absolutely perfect for the occasion and displayed all the desserts, ingredients and favors!
Although Anabelle and Mikayla were going to decorate their own treats, I just had to make some of my own! I had originally made chef hat cake pops for my dear friend, Natalie at Southern Belle's Charm for her son, Greyson's pizza party last year. This time, I added pink flowers to match the girls' hats and also made some cupcake cake pops, while both were housed in mixing bowls with baking ingredients of flour and "frosting". Instead of utilizing sticks, I made the pops on these super sweet polka dot paper straws from Cakes and Kids. Just a couple of days before, I saw the most darling tutorial to make edible cupcake boxes from Sweet Simple Stuff out of chocolate and meringue cookies and decided to try it and the result was absolutely precious and perfect!
The rest of the fridge displayed milk cartons (from a template from A Little Hut), egg-shaped sugar cookies and marshmallow bags. The favors were also housed here, including pastries of both felt and erasers from the Target discount bins. I also ordered the most adorable brown little treat bags from Cakes and Kids, which carried the erasers, and provided cupcake boxes in which to carry them home.
The play oven displayed some cupcakes that I made with toppers matching back to the adorable clip art. Baking inside were the plain chocolate cupcakes and sugar cookies, baked with love, of course, and waiting to be frosted and sprinkled! I also found the cutest cupcake-shaped truffles in my local grocery store, which I included inside measuring cups.
The sprinkle section of the cupcake bar was inspired by a pin by the fabulous Jessica at Party Box Design on Pinterest (originally from Keukenprinses), who also has some of the most darling cupcake invites and printables! I also made some cupcake chocolates on sticks, which I arranged in "I ♥ U" mini vases. The vanilla and strawberry frosting for the sweets were packed into individual plastic cupcake containers found at Home Goods, which were perfect for the girls to carry to their tables and spread some love!
One of my favorite aspects of parties these days are the photo ops and I was inspired by some bakery booths that I had seen from Pottery Barn Kids last year, as well as She's Kinda Crafty's latest party. For an easy-to-make prop, I simply used an empty frame that my husband tied to some tree branches, and embellished it with additional cupcake liner flowers with the word "BAKERY" spelled out, inspired by the gorgeous banner created by Natalie at Southern Belle's Charm with doilies and coffee filters from our latest "Just My Type" Valentine collaboration!
Both Anabelle and Mikayla had an absolute blast dressing up in their chef hats and aprons, decorating their goodies (especially with the sprinkles ~ so glad we decided to do it outside!) and gobbling up the goodies!
The bakery window did not disappoint! How cute are these photos of the girls showing off their creations and treats?!
These days, we are so fortunate to have access to so much inspiration on the internet, in blogs and on Pinterest. As you can see, I definitely took advantage of all the amazing resources and tutorials out there! We had such a fun time "spreading the love"! Wishing you all a very sweet Valentine's Day! ♥

2.09.2012

You're Just My Type!

Valentine's Day is less than a week away and I'm so excited to share some love with you with this "Just My Type" photo shoot! I am always so thrilled when Natalie of Southern Belle's Charm contacts me to collaborate on a project. With her amazing ideas and styling talents and the gorgeous printable design work by Paula of Frog Prince Paperie, the concept of a coffee shop date came to life! Instead of the modern-day communication tools of e-mailing and texting, Natalie chose a throwback to classic love letters written on an old school typewriter and thus leading up to the play on words of letting your sweeties know they are just your "type"! We teamed up with the super talented April of April Summers Photography, who took these gorgeous pictures of the party set-up, as well as Greyson's and Anabelle's Valentine play date!
I just adore the fresh color combination in the printable set, combining the traditional red and white with greys and tans. The typeset letters are also a great touch, especially in the background with the X's and O's! Paula's work is always so detailed and perfect! After typing up his invitation and Valentine, Greyson placed his call to Anabelle to request a play date! And as Anabelle received Greyson's call, she proceeded to get dolled up and type up her own Valentine!
The sweets were displayed on a beautiful hutch and surrounded by so many stunning details! How beautiful are the printables that Natalie embellished with doilies and coffee filters?! Natalie brought a plain white cake, which we adorned with "XO" sugar cookies. Its simplicity paired with the red cake stand made it so very sweet and distinctive. I made red velvet heart-shaped whoopie pies, on which we placed fondant toppers, and I added some red and white sprinkles to the cream cheese filling for some additional sparkle and pop! Natalie also found the perfect mold so I could make the red chocolate typewriters. I dipped Oreo cookie pops in red chocolate and added fondant typewriter keys spelling out "Just My Type" held up by vintage slide protector reels. With an adorable "side of the cup" cookie cutter from Cost Plus World Market, I made fondant-decorated cookies that were perfect accessories for the Repurpose coffee cups! I think these were my absolute favorite!
How cute is this photo sequence that April shot with the kiddos?! She really was able to capture the beautiful setting and props, along with their distinctive personalities!
Natalie had the ingenious idea of not only letting the kids play games on their play date, but making them that much more fun and sweet by ensuring they were edible! The checker pieces were fondant-covered sugar cookies in X's and O's, while the tic-tac-toe pieces were sugar cube-resembling fondant pieces! Now that's a great reward for winning!
The kids has an a blast on their play date and went to town on the goodies when it was all over! I just adore how the entire shoot came together and am so grateful to be able to work with these fabulous and over-the-top talented ladies! Hope we were able to provide some loving inspiration for the sweetest day of the year! Though, really, everyday should be a sweet day! ♥

Vendor Credits
Concept, Design & Styling: Southern Belle’s Charm


Printables: Frog Prince Paperie

Fondant Toppers, Cookies, Oreo Pops, Typewriters, Whoopie Pies – Lynlee’s Petite Cakes

Twine - The Twinery

Insulated Disposable Cups – Repurpose


1.31.2012

Sending All My Love!

Happy New Year, sweet friends! Okay, so it's already been a month since we welcomed 2012, but the start to this new year has been extremely busy! And now that February is just a day away, I thought I'd kick it off with a tutorial to make fondant cupcake toppers for your Valentine. Last year, my daughter and I made some "Fortunate to Have a Friend Like You" Valentine treats, which were a big hit! This year, I've seen lots of adorable Valentine and party ideas out there to facilitate in spreading the love, including a fabulous collection of free printables available at the inspiration-filled Catch My Party. Be sure to click on the link to visit the site for a large selection of designs by some of the most talented designers! And did I meantion ~ free?! These "Sending All My Love" toppers will help cover all your bases with a love letter, a flying heart and blown kisses!
Supplies you will need:
  • Red and white fondant
  • Rolling pin
  • Oval cutters (I utilized two sizes)
  • Heart and butterfly-shaped cutters
  • Large square cutter
  • Food safe brush & water
  • Round tip (in this case, I used Wilton tip 12)
  • Fondant or pizza cutter
  • Small spatula
  • Modeling stick (or toothpick or any "pointy" tool you might have in the kitchen)
Start out by rolling some red fondant into a ball and pressing it down on a flat surface until it is approximately 1/2" thick. Cut out an oval shape with the larger cutter and begin to pinch the shape on both sides to create the sides of the mouth.
At the same time, use your fingers to soften the perimeter of the mouth to round it out. With a heart cutter, position the top in the middle of the fondant lips and lightly press to make an indentation. Create a small separation at the top of the lips with the small spatula and finish the kissing lips with the modeling stick through the center.
You can repeat the process with the smaller oval cutter to make small lips for blown kisses!
Moving on to the heart with wings topper, roll out some more red fondant (approx. 1/4" thick) and cut out a heart shape with the cutter and put it aside.
Roll out some white fondant and utilize the butterfly cutter to punch out the shape to utilize as wings. With the spatula, cut the butterfly shape in half and space the two halves so that they would contour the heart. Trim off the excess with the heart shape cutter. Brush some water on the wings and attach them to the red heart and allow it to dry.
For the quill heart decor, roll out more white fondant about 1/8" thick (you can see I like to use rolling pin guide rings to keep it consistent and flat across) and cut out a strip about 1/4" wide with the rolling cutter. I measured about 4 inches and then turned it upside down and added some water with the brush to both ends of the strip.
Begin to roll both sides inward until they come together, while positioning the bottom into a point for the bottom of the heart. Add a bit more water to attach the two quilled sides together.
Attach it to the winged heart by brushing water to the back and placing it in the center of the red heart.
You can play around with the quilling process and make additional hearts in all different colors and sizes!
For the love letter and envelope, roll out white fondant 1/8" thick, cut out a square with the cutter and then cut it in half once again. 
Turn the square cutter on a 45 degree angle and position it over the fondant rectangle, making sure one side is right up to the edge of the shape to make the fold of the envelope. Trim off the excess to make the envelope even. Then roll out some red fondant and repeat steps to cut it to scale with the envelope, but avoiding the indentation step.
With the remaining red fondant, punch out a small circle with the size 12 tip and start pinching it together at one end to create the bottom of the heart. With the spatula, create an indentation for the top of the heart and glue it onto the envelope. Brush some additional water to the bottom of the envelope to attach to the red letter.
Hoping these cupcakes and toppers will help you send all your love to your Valentines and make their day all that much sweeter!!! ♥